|
|
Personal Projects
|
|
|
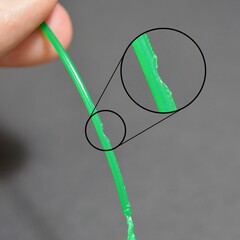
Hey everyone! Today’s post is going to be a bit different, I’ve recently purchased my first 3D printer and have been running it through it’s ropes on quite a few projects. While I’m still a beginner, there’s a lot I learned in a short amount of time… that I wish I had known earlier! So today I’d like to share some of the tips and tricks I’ve learned, while 3D printing for the first time. Getting StartedTo start with, I’m using an Ender 3 printer. It’s fairly compact size, but big enough to still do fairly large prints (220 x 220 x 250 mm). At it’s approachable cost point, and ease of assembly… I would definitely recommend the Ender 3 as a starter printer. During assembly, I’d say probably one of the most important elements to look out for are the sensors for the X and Z axis, these help the machine understand and recalibrate it’s XYZ axis. Keep a close eye on how these attach, a slightly misaligned Z sensor will have your extruder trying to print under your printable area… vs ontop. Also keep an eye out for the power supply toggle switch in the back, if it’s set on the wrong voltage for your outlet, the machine won’t turn on. Honestly assembly was a breeze, and the Creality website has many video tutorials on assembly. When selecting a filament to work with, I’ve been working with PLA. From what I’ve read, it seems to be valued for it’s ease of printing. ABS is a strong material, but PLA typically runs into less issues. I was doing a lot of research at one point on potential concerns, printing in the cold, etc and each time PLA seemed to be fine. I would say the one mistake I made here was that I ordered the assorted pack of filament from Crealty, not really realizing it’s not much of a deal. You get five 200 gram rolls of various filament colors, but 200g is really not a lot… and I had many more issues with my prints until I moved onto a new roll. It may be because these are cheaper filaments used in the variety pack… I’m not sure, but I will say the filament is printing much nicer from a new 1k gram roll for the same price. The standard 1.75 mm black PLA from the Creailty website works very well. Before moving on, I have done some research in other filament types and it’s a wild world out there… There are various metal filaments, and I attempted to use a wooden filament, but my knowledge here is extremely limited. I had issues with the wooden filament gunking up the extruder, not printing well, and it’s a fire hazard… I wouldn’t recommend experimenting with filaments until you’re more comfortable. After installing your filament and turning on your 3D printer for the first time, I’d suggest looking at a few things. Within the machine menu, going to prepare and selecting auto home, and watch where the extruder head ends up. Is it below the build plate, above? The next step is crucial, you need to start leveling the head of your extruder, to the build plate. They suggest using a piece of paper between the extruder head and the build plate, to gauge distance, but you can eyeball it pretty easily. There are four easily adjustable knobs on each corner, to ensure that everything is leveled. I usually turn the machine off, and so I can manually move the extruder around on the board to make sure the connection is good. Once satisfied, I would auto home once again, and within the control menu, play around with the positions of your extruder to head to confirm your bed is leveled. I have heard that the springs are notoriously loose on the Ender 3, and I saw a suggestion to get stronger springs to hold the level better… I may do this at some point, but I honestly just regularly check the bed level to make sure it’s fine. There is also an auto leveling perpetual on the Creality website, I haven’t used it yet but I can certainly see how that would help. With the printer assembled, filament installed, and print bed leveled, you’re ready to start printing! Just have to select a file. Finding a ModelWhen looking for models to print online, there are a lot of options. To start I’d recommend browsing thingverse.com, they have a wide variety of free to use models and I would just keep an eye on the number of “makes” a file has. If it has many people making it, I would assume the files are pretty good to print. If you’re unsure, you can always use other sources like etsy to purchase a model, these may be more reliable since you’re actually paying for them. As far as legality on if you can resell printed models, that’s typically between you and the artist… best bet is to ask. Once you have your files, they’ll typically be in a zip folder of STL or perhaps OBJ files. These should all load within the Creality Slicer that came with your Ender 3. Creality Slicer Settings and adjustmentsBefore jumping into the Creality Slicer, I’ll just say that this is my only baseline of knowledge and can see there’s a lot of other softwares out there. Many people seem to vouch for Cura, but I’ve also seen people frustrated as they were printing fine with the Creality Slicer… and have issues with the settings to get Cura going. Regardless I would suggest starting with the given software, and evolve as you go. With your downloaded model, go ahead and load this into the Creality Slicer. It should appear as a 3D object within your printable area. If it’s too large, you should play with the scale options, by selecting the “plus sign” it will auto size to max print area…. Keep in mind that’s fairly large and you may not want that on the first print. On your initial print, I would keep to the basic settings here. Normal or fast should be more than adequate for a simple print, but if you’re looking to try higher quality first you can select that option yet it does increase the time significantly. Depending on the complexity of your model, you may need “Supports.” Essentially if your model has overhanging edges that are 60* or more, you’re likely going to want to select supports. What this will do is print extra material like scaffolding that will help everything print nicely. If you were to go into the full settings mode, you’ll see more options for supports. I recommend sticking to “grid” vs “lines”, I’ve had the best luck with it, and you can either have touching “build plate” or “everywhere.” If you’re printing a character, you may want to consider everywhere so it’ll help support the most detail… BUT you may have to trim more little pieces off in the end product. Fill amount is typically good at 15%, but I have noticed on some small models that’s pretty strong… you may want to consider going lower, depending on how delicate it needs to be. I also always print on a “raft” platform, again just seems to work well. Now, those are really all the basic settings you need to understand before doing a basic print. There’s a ton of other stuff that I’ve only begun to experiment with, for example you may want to play with the “fill density” of your object in the advanced settings, if you don’t need it to be quite so thick with material. This will help you print faster and use less. You could also modify the support angle on your grid, within the advanced menu, if you wanted to be very precise on where exactly supports go. Yet, you likely don’t need to mess too much with these settings when you’re starting off. One final recommendation I may have here, is to always double check your model by changing the view mode to layers before saving the file. This will allow you to see exactly what gets printed, sometimes your build platform will be outside the print area and you may not see it until you check the layers. Next all you need to do is to save your gcode file, onto the micro SD card that it came with. Another note, try not to put your files in subfolders… I had been doing this and encountered an unfortunate bug where pausing and resuming a print has issues if your file isn’t in the root. I figure it’s best to be safe and leave it at the root. Print!Okay so you’ve got your model loaded up on the SD card, it’s back in your printer and it’s powered on. Now, typically a print will auto home itself and get ready on it’s own settings… BUT if you’re anything like me and want to make double sure, you’ll want to do that now. In the prepare menu, be sure to “auto home”, look and make sure your bed is leveled, and you should be good to go. Navigate to print, and you should be on your way. Problem : Warping or Bed AdhesionNow from here, things should go smoothly and the printer will auto print the model on it’s own. Yet there have been a few issues I’ve run into that I’d like to share, as well as the solutions I’ve found. My initial biggest problem was the platform of my 3D object not always staying stuck to the build plate, this can cause warping, misalignment, and an unstable print. I only later found out about “3D Print Adhesives,” they can be found on Amazon and I purchased one called “bed weld.” The way these work, is that you apply a layer of this adhesive to the build plate before getting started. Then as your build plate heats to 60* C, it bakes on and is ready to print. I would totally recommend looking into something like this to get you started. That said, I continued to have issues on some of the larger prints I started doing. If you’re doing prints that are 40+ hours, I’m not convinced this adhesive is strong enough to last… in these instances, I’ve found that it’s actually really easy and worthwhile to run a bead of hot glue around your build platform as it’s building. I know it sounds pretty scary, and the build platform is pretty hot, but at 60*c it seems to still cool and harden the hot glue. I’ve had no issues getting hot glue off the build plate later, and if you do… you can use your printer to heat the plate and it should come right off. While it’s not horribly aesthetic, I really believe in the hot glue method for longer prints, to ensure bed adhesion. I would also just say, to be careful about letting your build plate cool and heat too often… that seems to really cause instability in the adhesion. There was one instance where my model became detached from the build plate, and I was able to line it back up and hot glue it.. And managed to get the print to continue successfully. NOT something I’d recommend, but if you're desperate after a long print, like I was, it worked. Also I have had the recommendation to get a glass build plate, this would help with bed adhesion, heat, etc. Problem : Pausing and Resuming PrintsIt’s possible to pause and resume your prints using the onboard Ender menu, but it’s very finicky and I honestly wouldn’t recommend it. The issue I typically run into, is when you use the onboard “resume” function, it will move the extruder head linearly into position to resume… which could mean dragging the extruder tip through already printed material… it makes a mess. After learning a method on how to repair a gcode file, I tend to go back to this method to resume my prints. Gcode : Print from specific layerThis method works well if you need to resume your print from a specific layer because you’ve run out of filament, there was an issue in printing, etc. Your best bet is to note the Z height of the extruder (if it’s at the right height). If it’s way above the layer you’d like to start printing on, I’d go ahead and first auto home (you wouldn’t believe of often ender 3 forgets where it’s height is). From here, I’d use the controls on the Ender 3 menu to move your extruder head to be right above the last finished layer. Using the right settings should allow you to get right up to the appropriate height (without crushing your model.. Be careful). Note the Z height of your extruder head, it should appear on the screen. With this in hand, hop over to your computer and open the gcode file up in your favorite text editor. I recommend notepad++ if you have it, but notepad works fine. Now what you’re going to want to do is to search (cntrl + f) the z height of your layer. This should allow you to navigate to the layer in question and determine if you want to go down a layer or above… use your best judgement. From here, you want to select everything above that layer, all the way into the intro text, and delete. I first made the mistake of removing some of that intro text, but this is very important for getting your print initialized. The only setting I suggest removing is : G28 Z0 ;move Z to min endstops This is because I like to manually set the Z before getting started, this way I don’t have to worry about the extruder head being dragged across my model. So once your file is ready, you’ve deleted all the previous layers (until the intro text) and you’ve saved this file back out to your SD card and inserted back into the printer. This time, when you get started on your print, make sure to auto home but after use the control to move the Z back up to higher than your print area. I suggest this so the extruder will move downward into position, and is less likely to destroy your work. Hitting print on this file, and you should be good to go to resume your print. I’ve used this to recover from a few printing mistakes, and now really enjoy getting into the gcode file. (This is another references to the same method) Filament Grinding Filament grinding is another issue I’ve run into, what this looks like is your filament stops printing and if you look closely… the little gear used to extrude material will have worn away a smooth zone on the filament and it is no longer feeding it into the tube. You’ll need to pause your print, and pull the filament out if you can. I tend to just clip a little bit of material off the end, just enough so I can feed enough to get past the grounded spot. Then re-feed your filament back into the machine, and it should be good to go. I haven’t had issues with the extruder head becoming clogged but I know that it’s an issue. I’ve found to compensate for filament grinding you should consider increasing the heat of your extruder tip, this way the filament can more easily flow out. I suggest going up 10*C or so, and you can also consider slowing down your print. If you’re doing a fast print, this could cause some filament grinding. Finally, it also comes down to the quality of your filament. I had a beginner roll that just never really wanted to feed well, so keep that in mind. Finishing the PrintHopefully you won’t run into these issues above, but if you do that should help! At the end of the print you’ll have your new model waiting for you on the build plate. Now initially when I was using the basic filament, I had a lot of issues removing the printed platform from both the build plate but also the model itself. I had resorted to cutting material off at times, and only later realized that it should actually peel off quite nicely. While some resistance is expected, if things are printing properly you should be able to remove the bottom raft by hand. Once your model is removed from the build plate, be sure to wash and clean it off. Under running water with soap is fine for the build plate, it’s essential to get this cleaned off and ready for your next print. From here you’re free to sand, paint and finish your printed object. I believe that covers all of my initial lessons learned… I’m sure there are things I’m missing here but hopefully this is helpful to some of you looking to get started, and are running into some of the beginning issues I was. My final words of wisdom would be to not let any of this intimidate you, you’ll have good prints and failed prints. I’m reminded of my Tech Ed teacher from Middleschool who always said “The quality of a Carpenter isn’t gauged by the number of mistakes they make, but by how noticeable they are in the end.” This has been my mantra as I stumble my way through this new world of 3D printing, but I find it fits well.
Hope this was helpful in your 3D printing adventures!
2 Comments
|
AuthorI make games, I play games... and sometimes I have some thoughts about that. Archives
March 2024
|
Proudly powered by Weebly


 RSS Feed